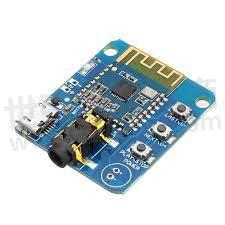
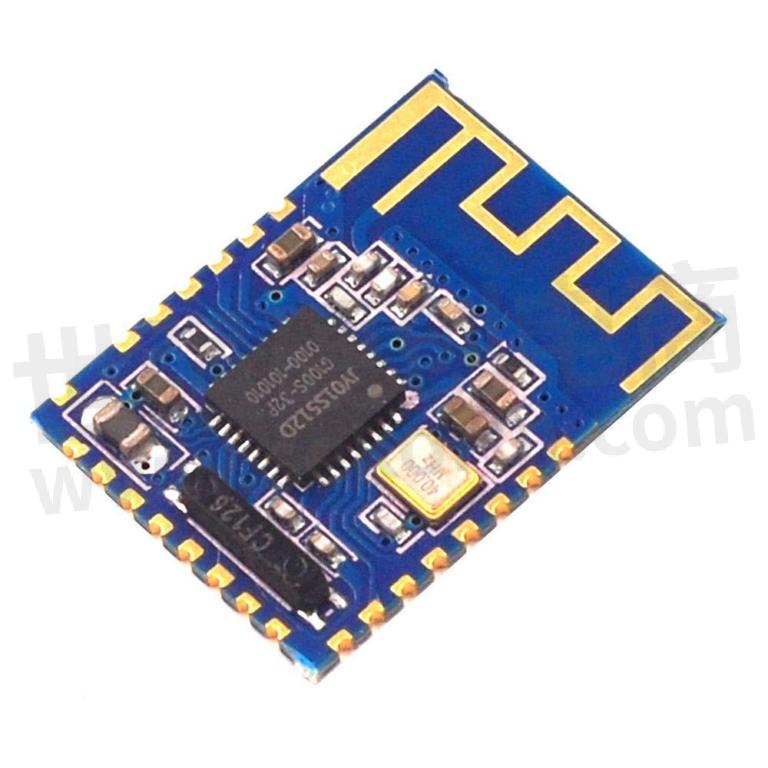
Introduction to Bluetooth Module 4.2


The first time we go to use this Bluetooth module 4.2, if you have never dealt with them, it is likely to be taken by despair, as you need to know some small details to use them correctly, but do not worry, it will become clear. Soon, and soon we will be able to use them without even thinking about it for a few seconds.

Bluetooth modules are a very convenient way of communication if you do not want to transmit data through a cable connection; they really have a lot of potential, as it is possible to simply transmit numbers, decimal numbers, character strings and everything we need.
Physical characteristics of the Bluetooth module 4.2
So let's start with how to connect our module to Arduino. This has four pins already soldered, plus two possibly to solder, but which we will not need: the four pins are RXD (<), TXD (>), GND (<), VCC (<).
At first sight it all seems clear enough, but it's easy to make the first mistakes right now; first of all, we are going to power, our module through a voltage of 3.3 V, and not 5 V as we usually do.
Then obviously we connect the GND pin to GND of Arduino, and finally we connect the RXD pin to the TX pin of Arduino, and TXD to RX; yes, the names of the two pins reverse, so by connecting them backwards we will not see any type of data transmission, Bluetooth module 4.2 and this is a very common problem.
Instead, if our module has the small side button, it will take the place of our hand-made contact, and the procedure will be to press the button while the Bluetooth module 4.2 is running, disconnect VCC, reconnect it and then release the button, which we have held down until then.
When we enter AT mode, we must remember that the transmission baud rate between our component and the serial interface automatically switches to 38400 baud, so if we try to use AT commands at a different baud rate we will not have any results; it is therefore necessary to enter the serial monitor window and set it correctly before proceeding.
How to connect two Bluetooth module 4.2?
The connections with our board appear, only a few small details are missing. First of all we have to understand how to enter AT mode; otherwise it will be impossible to connect two bluetooth modules with correct communication.
This is not very simple in some types of modules, as some have a small side button on the right of the pins that allows us to perform the operation, while others do not.
In any case, now we are going to see how to solve this problem. We always remember that our component we call a module because it comes on a base with copper tracks that allow us to use the micro controller without having to build a circuit every time.
This is fundamental, since to allow our HC-05 to enter AT mode it is necessary to use a cable connected to a voltage of 3.3 V.
How we can know the functions of Bluetooth module 4.2?
Bluetooth module 4.2 is a powerful device, after which put our cable in contact with pin 34 of the micro controller, which is the last one on the top right next to the resistors. At this point, always keeping the cable firmly in contact with the pin, we must disconnect the power supply from VCC, and immediately reconnect it, then removing the contact with pin 34.

We could therefore observe that the red led that indicates that our module is working slows down, remaining on for about two seconds and off as well. If the Led has this rhythm, we will have entered the AT mode.
Below you will find an image of our micro controller (EGBT046S) installed in the HC-05 module which represents the pins whose functions you need to know.
Is Bluetooth module 4.2 very convenient?
The Bluetooth module 4.2 is very convenient for certain things, in fact, thinking about the use of a PIR to create a home security system, this component could play a fundamental role in transmitting information when the module detects a presence at the front door, to notify us immediately.
We could therefore say that the Bluetooth module offers us transmission speed, convenience and versatility, and even if it is more expensive than making connections through data using the SDA and the SCL, its characteristics fully pay off for this detail.
Connection between HC-05 master and slave
After entering the AT mode (above we explain how to do it), we need to connect our two modules to make them communicate correctly.
Let's act on our master module, and, after loading the correct code shown above on the Arduino, we enter the serial monitor and write: AT, to verify that the module recognizes the AT commands, and will reply OK.
SKYLAB hopes that you have learnt some new concepts about Bluetooth module 4.2. If you are a beginner, this guide is going to help you a lot.
- |
- +1 赞 0
- 收藏
- 评论 0
本文由飞扬的沙转载自SKYLAB,原文标题为:How to install Bluetooth module 4.2 easily? Simple Guide,本站所有转载文章系出于传递更多信息之目的,且明确注明来源,不希望被转载的媒体或个人可与我们联系,我们将立即进行删除处理。
相关推荐
The Bluetooth 4.2 Module and the Differences Between Different Modules
The introduction of the Bluetooth 4.2 module has revolutionized the entire world. In this guide, SKYLAB will tell you everything you need to know about the Bluetooth 4.2 module and the differences between different modules out there.
What is Bluetooth 4.2?
This article SKYLAB targets and explains bluetooth 4.2 that easily available on the Internet. If you want to install a Bluetooth module yourself, please refer to this article.
A Comparison Between Bluetooth 5.0 Module and Bluetooth 4.2 Module
Here, SKYLAB will do a detailed comparison between the bluetooth 5.0 Module and Bluetooth 4.2 Module.And you will be able to decide for yourself which one is better for you.
Requirements for Bluetooth Modules in Intelligent Security Systems and Applicable Modules for Tiangong Measurement and Control
The Bluetooth module in the intelligent security system needs to have characteristics such as low power consumption, high security, stable connectivity, suitable transmission distance and penetration, small size and easy integration, multi device connection capability, anti-interference ability, and fast response. The SKB369 Bluetooth 4.2 low-power module from Tiangong Measurement and Control is suitable for devices with strict cost and power requirements; The SKB501 Bluetooth 5.0 module is suitable for intelligent security scenarios that require high transmission distance and performance.
The Introduction to Bluetooth Module 4.2
Bluetooth modules are a very convenient way of communication if you do not want to transmit data through a cable connection; they really have a lot of potential, as it is possible to simply transmit numbers, decimal numbers, character strings and everything we need.
What is Bluetooth 4.2 BLE Module?
Wireless and Bluetooth 4.2 BLE modules are comparable as they both assist users in connecting to their most preferred and significant products both for business and consumer use.
Why is Bluetooth 4.2 LE Modules Great Value for Money?
Blue tooth 4.2 LE modules beacons technology contributes a lot to improving the customer experience, strengthening the relationship and creating a personalized interaction.
世强有EMC3380-DJJ5蓝牙WIFI模块吗,或者能替换的
此型号是wifi双频+蓝牙组合的,如果客户想这两部分都需要,推荐天工测控的WG222,其中蓝牙支持4.2协议:【数据手册】WG222 Dual-Band Wi-Fi and Bluetooth Combo Module Datasheet;如果客户只选用蓝牙5.0协议的功能:SKB501 Multiprotocol Bluetooth 5/ANT Module Datasheet
推荐低成本 带透传的蓝牙模块
推荐天工测控公司低功耗蓝牙模块SKB369,支持串口透传功能,数据手册和介绍如下:1、SKB369 Multiprotocol Bluetooth 4.2/5.0 Low Energy Module Datasheet2、【产品】支持蓝牙串口透传功能的低功耗蓝牙4.2模块SKB369,可快速为产品添加蓝牙功能
天工测控WiFi模块选型表
天工测控面向物联网市场中的智慧物流,智能交通,智慧安防,智慧能源,智能医疗,智慧建筑,智能制造,智能家居,智能零售,智慧农业,智慧楼宇等应用场景研发推出了性能强大,且支持二次开发的2.4GHz单频及2.4/5GHz双频UART串口WiFi模块,USB接口WiFi模块,AP/Router无线路由WiFi模块及远距离图传WiFi模块,高清视频传输WiFi模块
|
产品型号
|
品类
|
无线模块标准
|
芯片
|
尺寸(mm)
|
封装
|
频率范围(GHZ)
|
数据速率(Mbps)
|
发射功率(dBm)
|
传输距离(米)
|
通讯接口
|
供电电压(V)
|
天线接口
|
|
WG219
|
WiFi模块
|
IoT b/g/n
|
ESP8266
|
25.5*18*3.2
|
SMD
|
2.4-2.5
|
72.2
|
18
|
100
|
3,5,6,8
|
3.3V
|
1个IPEX/PCB
|
选型表 - 天工测控 立即选型
天工测控SKG系列GNSS模块精度差异与RTK技术详解
RTK也称载波相位差分技术,通过对两测站的载波相位观测值进行实时处理,能实时提供测站的三维坐标,并达到厘米级或者毫米级的高精度。深圳市天工测控的RTK模块如SKG122ER等,支持多种配置,通过指令控制基站坐标锁定、伪距平滑、数据输出等,提高定位精度。
天工测控WiFi+蓝牙组合模块选型表
天工测控提供如下WiFi+蓝牙组合模块选型,数据速率72Mbps~1201Mbps,SMD封装,多种蓝牙标准可选
|
产品型号
|
品类
|
芯片
|
模块尺寸(L*W*H)(mm)
|
天线
|
封装
|
模块标准IEEE 802.11
|
频率范围(GHZ)
|
数据速率(Mbps)
|
WiFi接口
|
蓝牙标准
|
蓝牙接口
|
|
WG215
|
WiFi+蓝牙组合模块
|
ESP32
|
25.5*18*3.0
|
PCB/IPEX
|
SMD
|
b/g/n
|
2.4
|
150
|
UART
|
V2.1+EDR,BLE4.2
|
UART
|
选型表 - 天工测控 立即选型
天工测控BLE蓝牙模块选型表
天工测控针对物联网小数据,近距离的数据传输、智能控制等应用场景研发推出的BLE4.0/4.2/5.0低功耗蓝牙模块,功耗低,接收灵敏度高,传输距离远,支持UART/TWI通信协议,性能稳定可靠,支持二次开发,尺寸小巧,易于集成,产品能较好的嵌入到客户产品中,同时满足客户对蓝牙产品再次快速编程需求
|
产品型号
|
品类
|
标准协议
|
尺寸(mm)
|
工作模式
|
接收灵敏@1Mbps(dBm)
|
发射功率(dBm)
|
Flash(KB、MB)
|
RAM(KB)
|
广播功耗(100ms 间隔)(uA)
|
连续传输功耗(20ms 间隔)(uA)
|
深度睡眠功耗(uA)
|
待机状态功耗(uA)
|
最大广播距离(米)
|
接口
|
天线
|
|
SKB360
|
BLE蓝牙模块
|
BLE4.0
|
17.4*13.7*1.9
|
主,从,主从一体
|
-93
|
+4
|
256K
|
16K
|
270
|
1180
|
0.3
|
2.5
|
50
|
UART/PWM/GPIO/I²C
|
PCB/External
|
选型表 - 天工测控 立即选型
天工测控单北斗模块助力农机作业,开启智慧农业新时代
本文,我们要聚焦的是单北斗模块在农机作业上的神奇应用。单北斗模块在农机作业上的应用,为现代农业带来了新的机遇和挑战。它让我们看到了科技与农业的完美结合,也让我们对未来的农业发展充满了期待。让我们共同迎接北斗助力下的农机作业智慧新时代,为乡村振兴和农业现代化贡献更多的力量。
电子商城
服务
Ignion可支持多协议、宽频段的物联网天线方案设计,协议:Wi-Fi、Bluetooth、UWB、Lora、Zigbee、2G、3G、4G、5G、CBRS、GNSS、GSM、LTE-M、NB-IoT等,频段范围:400MHz~10600MHz。
最小起订量: 2500 提交需求>
支持Bluetooth SIG最新的测试规范,支持2.0(EDR), 2.1(EDR), 3.0(HS), 4.0(LE)规范, 并且能完整覆盖BR/EDR/HS/BLE的所有射频测试项目。测试标准:RF.TS/4.03 ;RF-PHYTS/40.3。
实验室地址: 深圳 提交需求>


登录 | 立即注册
提交评论